Note: I'm conscious that I always call this place a 'house'. Obviously it's a flat, part of a converted townhouse. However, because we live over multiple levels and have 2 sets of stairs its difficult to think of it as anything other than a little house, which is what most people remark it seems like when they see the flat for the first time. It's a quirky tardis like place- you'd never guess what the space is like looking from the outside.
I honestly can't put into words the pure relief of having heating. We lived in this flat, with it's 3 levels, 18 windows (including original skylights) most in dire need of refurbishment, for nearly 5 months before the pipes were all laid, boiler installed and gas connected. That's a big drafty space to occupy in winter, trust me. So as much as we were thrilled to have the house and take on the project, the freezing temperatures inside the flat made living here pretty difficult at times.
As I recall it was about 3 months after we moved in before we got the windows repaired and replaced where necessary. A couple of the original sash casements were literally hanging on for dear life, causing big gaps between the frames and allowing the indoors and outdoors to unite in their sub zero temperatures.
So it was a great day indeed when the new windows came:


 |
| Before- note gap in top right hand corner where sash had slipped. |
 |
| After- shiny new windows. |
 |
We knew we'd need to install gas central heating. Meantime, we had the existing electric panel heaters- the only source of heating in the flat. Unfortunately with the costs of the build, we struggled to justify turning the heaters on due to their inefficiency and high bills associated with use, particularly before the windows were restored/replaced.
 |
| A view into our bedroom- living the dream! |
The next thing we had to think about was the positions of radiators. Not as easy as you'd think. On one hand there is a great freedom having the option to start from scratch and choose where everything goes but on the other hand it's tricky to have the responsibility of choosing firm positions for radiators, power points etc. I guess when you move into a house under normal circumstances, you take for granted that radiators etc are in situ- they just are where they are and you work around them. So we had some lengthy discussions about the placement of radiators which required some serious vision as to how we'd use the space, where we'd put furniture etc. Luckily, I think our gut instincts on placement turned out to be correct.
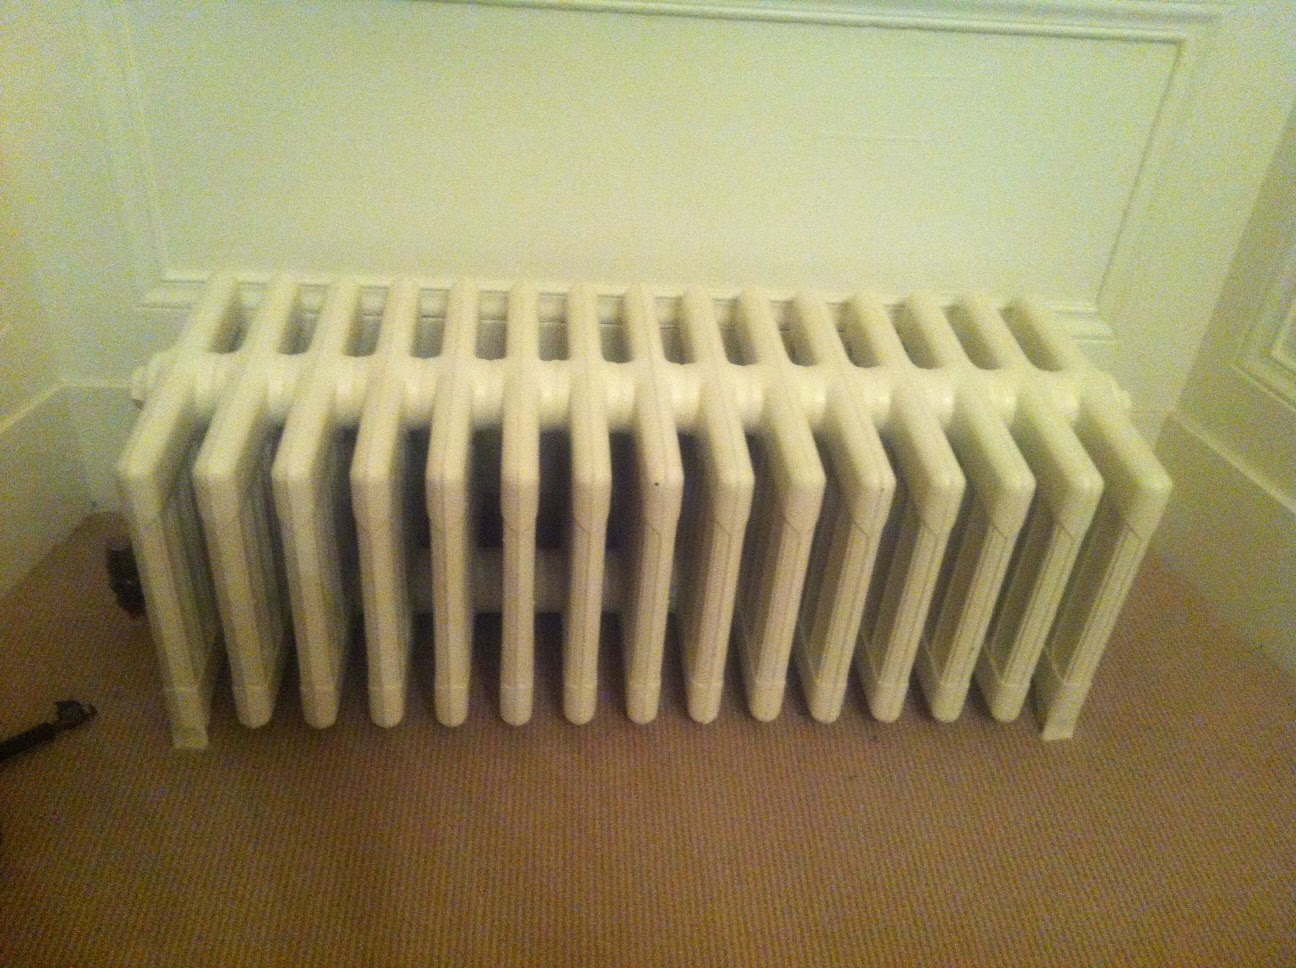
Next, we had to actually buy radiators. Our builder suggested flat panel radiators which are the 'norm'. However I'm not a fan of flat panel rads in older properties and we were determined to restore the flat as sympathetically as possible. A family member suggested the Acova radiators that are sort of replica cast iron available at B&Q etc but to my mind they look a bit shiny and plasticky and actually aren't that cheap so having considered all options, we headed off to the salvage yard to check out reclaimed.
Despite being Glasgow based, we ended up purchasing most of our wonderful radiators from EASY (Edinburgh Architectural Salvage Yard). The reason for this is that most of the ones in Glasgow are not yet restored and get sent off to Edinburgh for testing and priming etc if required. We decided to cut out the middle man and go to Edinburgh where the rads are already paired in their respective sizes, properly flushed through, refurbished and primed ready for painting. The lazy mans choice arguably but the ultimate costs were comparable so it made the whole selection process a lot easier than crawling around Glasgow Salvage yard selecting our options from an inaccessible pile. I should say however, that we bought some other items from GAS and they are brilliant.
As an aside, it's important to calculate the required BTU to make sure that the radiators you choose will adequately heat the room. We'd already done this and chose our rads according to their 4 bar width and appropriate amount of sections. I love the aesthetic of the 'ribs' on these radiators- they are so sculptural and beautiful which is why we were so determined to buy reclaimed. Once delivered, some serious manpower was employed to carry each radiator from the ground floor of the building, up the flights of stairs and into our flat. To save costs and to ensure the rads were evenly painted before installation, we decided to paint them ourselves using graphite grey spray paint:

And here is Steve in action painting them. He's trying to look like a 'hoodie' on purpose- I indulged him. Cue some artsy shots:


A couple of the radiators we needed were odd sizes to fit a particular space, so we restored those ourselves.
 |
| Radiator for kitchen being sanded back. |
We then had to select valves for the radiators. I chose traditional style wheel head valves but in a contemporary black nickel finish to match our light switches and sockets. Not the cheapest option but then there's no point cheapening the overall look with plastic valves in my opinion.
Some of the radiators we painted remain this graphite grey to blend in with a colour palette of blacks and greys. However, when it came to picking colours for the rooms, some of our paint choices weren't necessarily the most harmonious match with the grey- for example in the bedrooms. So we decided to invest in a paint gun and repaint some of the radiators in Farrow & Ball eggshell to tie in with the woodwork whilst the rooms were still at the undercoat stage. It was so much quicker and easier using the paint gun- a Black & Decker brand picked up relatively cheaply from a DIY store. I'd recommend this option if you're considering painting radiators or large piece of furniture!
Here is the end result in our living room. I think we made the right choice (sorry for poor quality iPhone pics):


And a special radiator in the bedroom- great for sitting on to warm up whilst looking out the window admiring the view!
I remember vividly, maybe a week after the heating was installed, sitting in the living room just before Christmas with a jumper and big furry gilet on. Our plumber walked in and said 'why are you huddled in here?', to which I responded, 'It's cold!'. 'Put the bloody heating on'! he exclaimed and we both started laughing. I guess having gone without for so long, it seemed a bit alien to have heating on tap as it were.
More than one year on and I'm pleased to report that whilst our flat being an old building still suffers the usual chilly evening here and there, it's generally a lovely homely, cosy place to be. Job done!